
Webflow is a popular website builder that gives designers a lot of control over how their site looks. It has a built-in place to add head code that applies to your whole site, which is all Converly needs to track your forms. To install Converly on your Webflow site, follow the instructions below:
Step 1: Copy your install code
The first step is to grab your Converly install code. In Converly, click Install in the left sidebar and copy the code shown at the top. It is unique to your site, so make sure you copy the exact code shown there rather than reusing code from anywhere else. See Install Converly for the full walkthrough.
Step 2: Open your Webflow site settings
The next step is to find where Webflow lets you add custom code. Open your project, go to Site Settings, and select the Custom Code tab at the top.
Step 3: Paste your code in the head and save
In the Head Code box, paste the code from your Converly account, then click Save Changes.
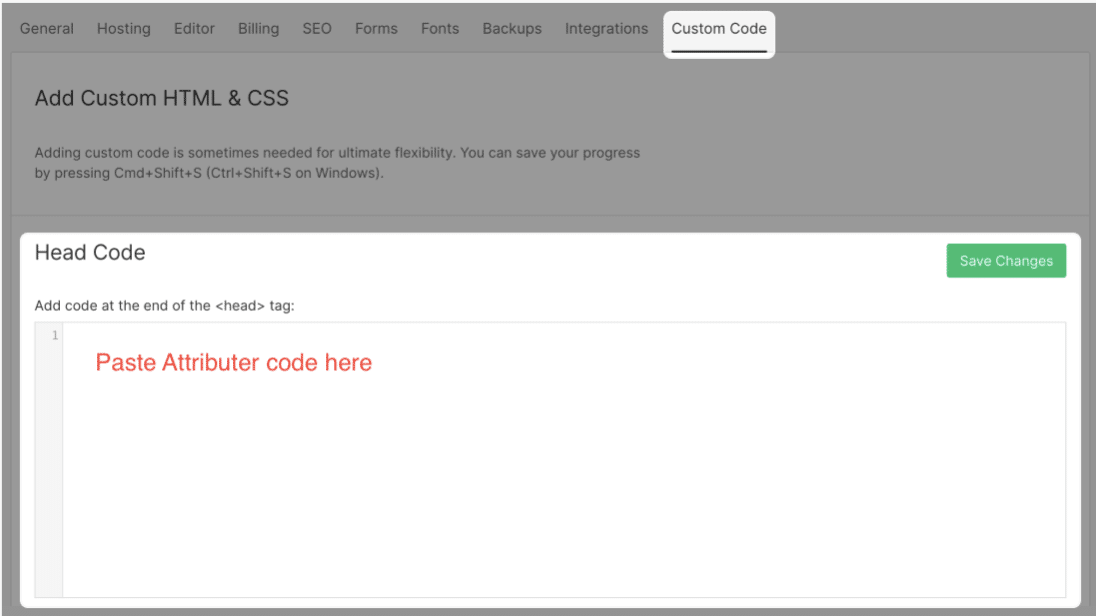
Webflow only applies custom code on the published site, so click Publish afterwards to push the change live.
Test it works
That's it! Converly is now installed on your Webflow site. To check it is working, open a new incognito window, go to your website, and submit a test entry through one of your forms. Then open the Activity page in Converly. If the code is installed correctly, the test conversion shows up there within a moment.
Paste your own code
Any code shown in a screenshot is only an example. Always paste the exact code from your own Install page, which contains the key that is unique to your site. Code copied from anywhere else will not track to your account.