ChatGPT Ads is OpenAI's advertising platform, where your ads appear inside ChatGPT itself. Sending conversions to it tells OpenAI which ad clicks turned into real leads, so it can optimise delivery and report accurately.
There is no browser pixel to worry about here. Converly sends every conversion server-side through OpenAI's Conversions API, so ad blockers and privacy settings can't get in the way.
A destination is added inside a flow as an action, so you connect ChatGPT Ads while building (or editing) a flow.
Before you start: you need a flow that already has a trigger set up (see Building a flow), and access to your ChatGPT Ads account.
Step 1: Add an action
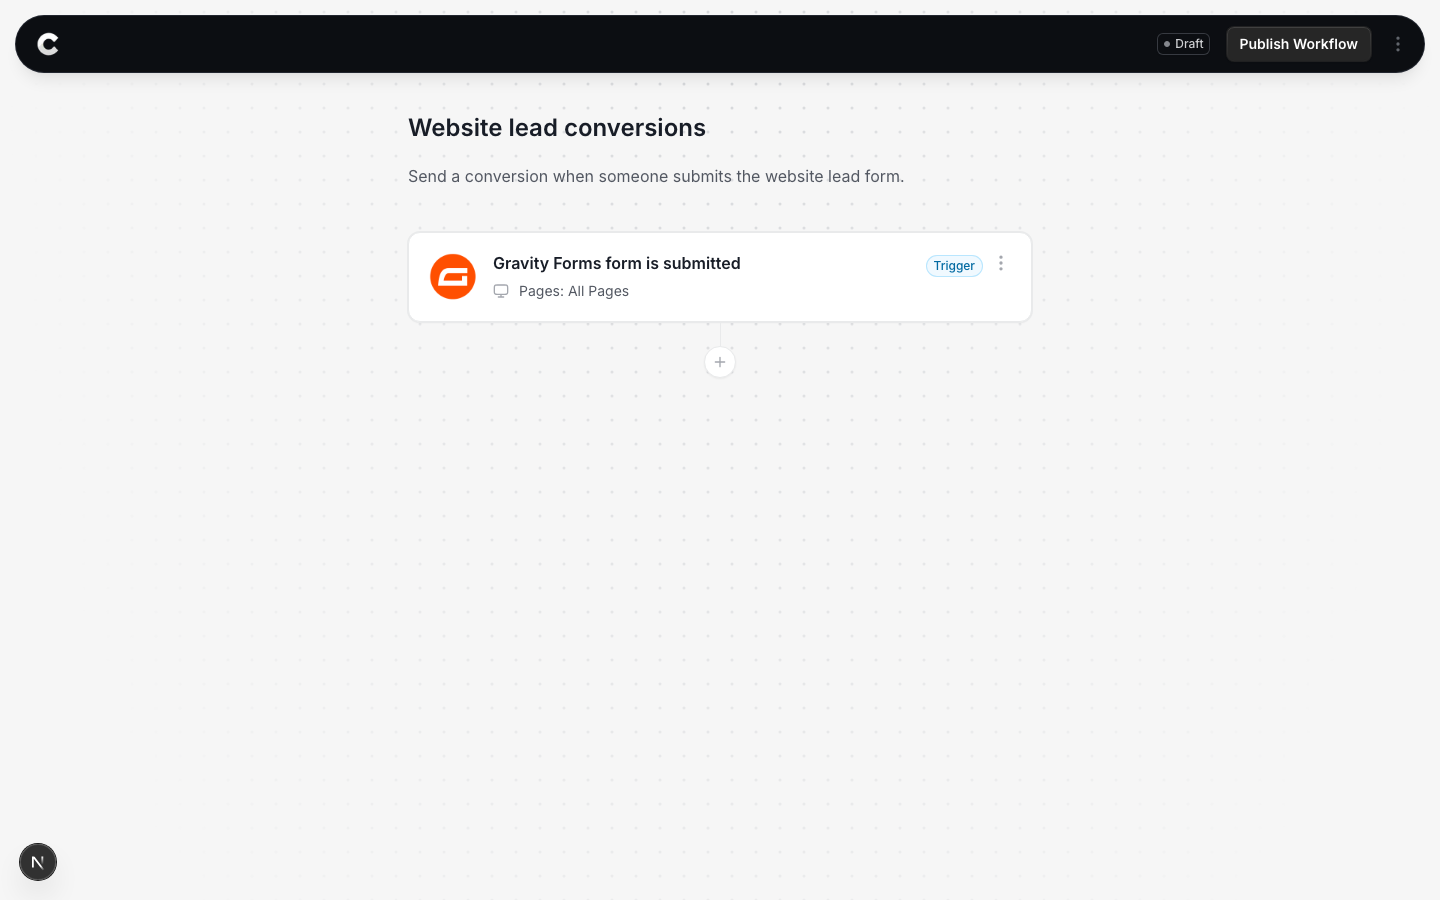
Open the flow with your trigger. Below the trigger card there is a + button. Click it to add an action.
Step 2: Choose ChatGPT Ads
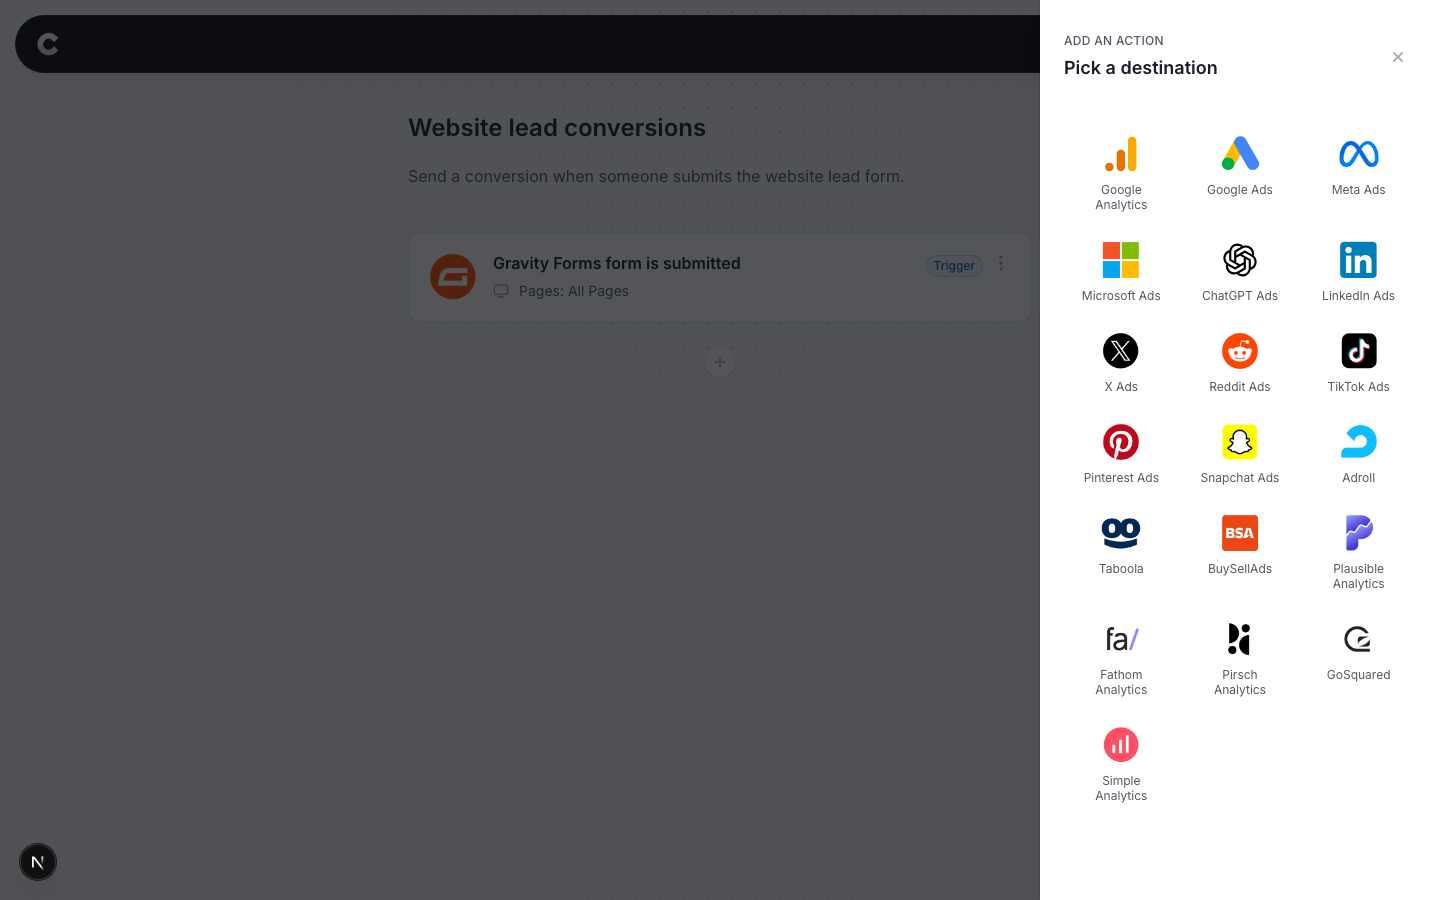
A panel slides in from the right listing every destination Converly can send to. Click ChatGPT Ads.
Step 3: Create an Ads API key
The next step is to grab an API key from ChatGPT Ads Manager so Converly can set everything up for you.
In ChatGPT Ads Manager, open Settings, click the General tab, and create an API key. Copy it straight away.
There are 2 kinds of key. You want the Ads API key.
ChatGPT Ads has 2 different keys and their names are easy to confuse. The Ads API key (the one you just created under Settings) is what Converly needs. The Conversions API key is a different key that lives under the Conversions section. You don't need to create that one at all. Converly creates it for you.
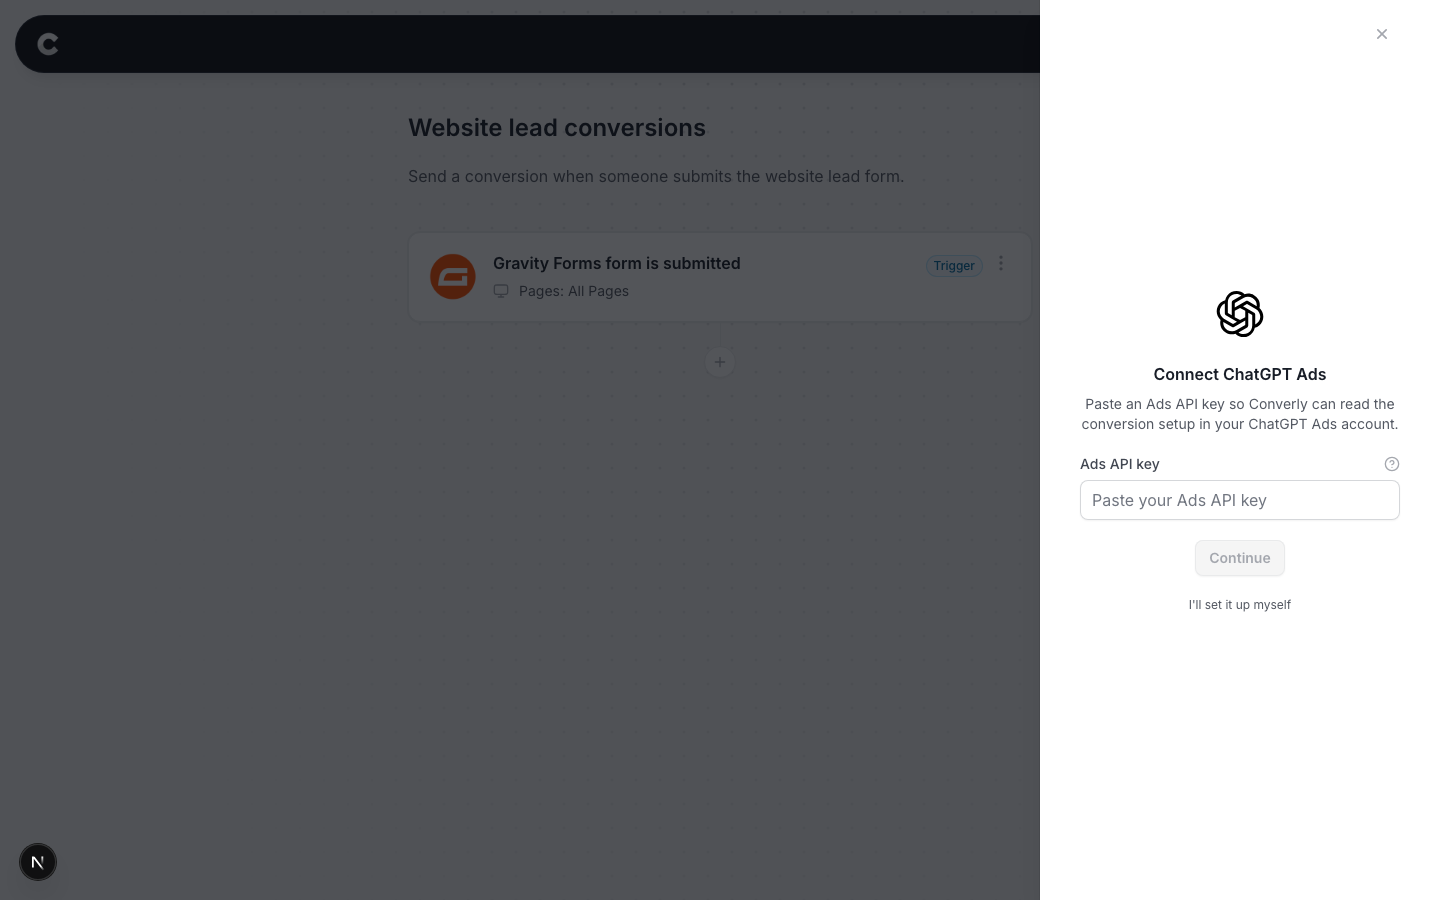
Step 4: Paste the key into Converly
Back in Converly, simply paste the Ads API key into the box and click Continue.
This step is completely safe to repeat. Converly only uses the key to read your account's conversion setup, so nothing is created or changed yet.
Step 5: Choose your data source
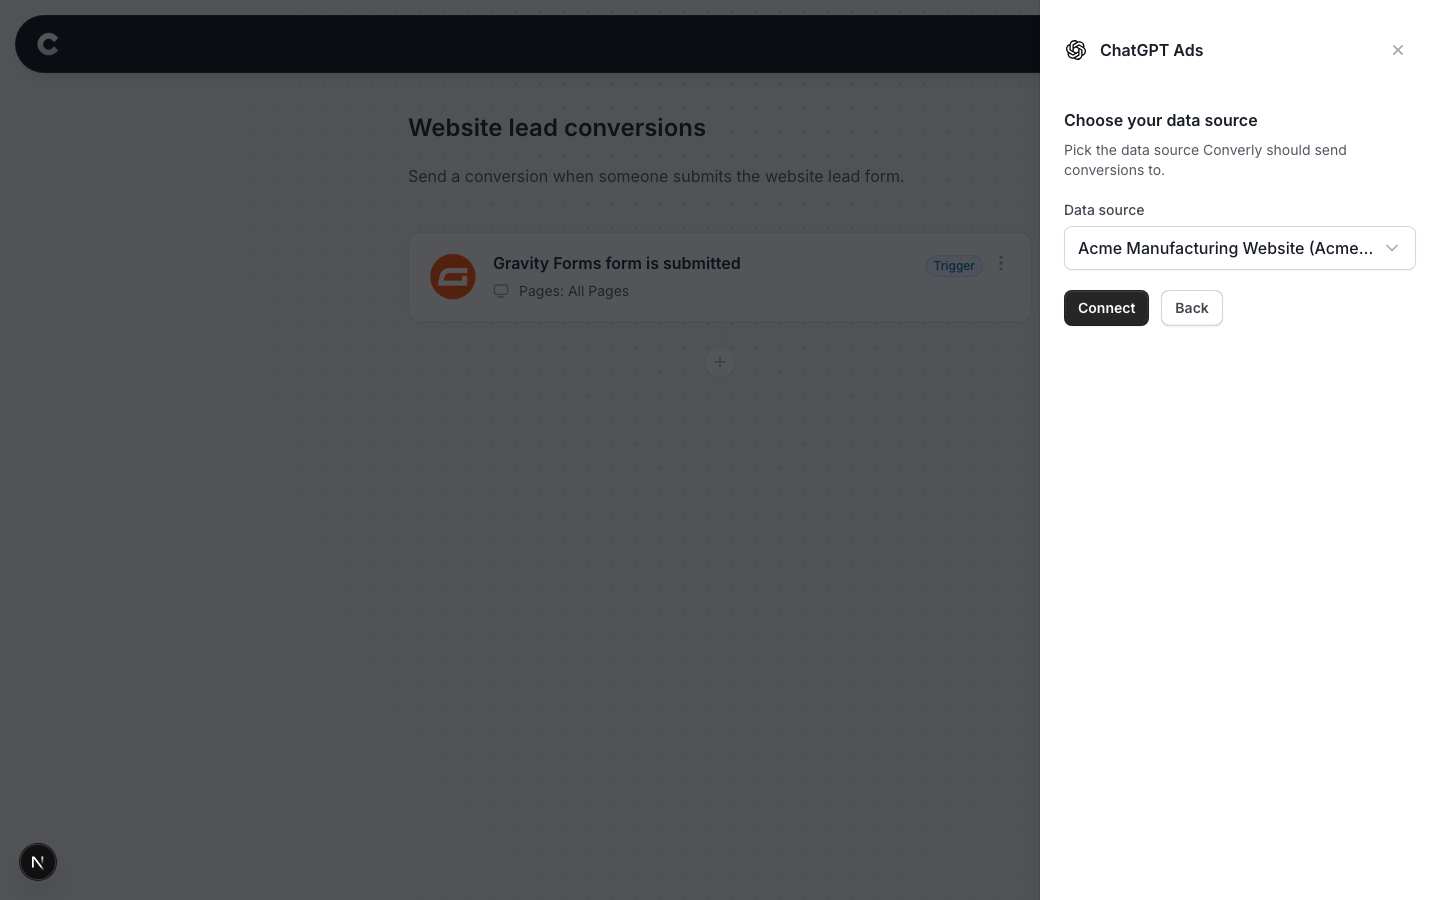
Converly then shows the data sources in your ChatGPT Ads account. A data source is the container OpenAI uses to group your conversions, and you can see the same list in Ads Manager under the Conversions section.
Pick the one Converly should send conversions to from the dropdown. Each option shows the data source's name and its ID, so you can match it against what you see in Ads Manager.
If you don't have one yet (or want a fresh one), choose Create a new data source at the bottom of the dropdown, give it a name, and click Create and connect. Converly suggests a name based on your website so it stays recognisable in Ads Manager later.
Data sources are permanent
ChatGPT Ads has no way to rename or delete a data source once it exists. That's an OpenAI limitation, not a Converly one. So if you create a new one, pick a name you're happy to see in your account permanently.
Step 6: Choose your conversion
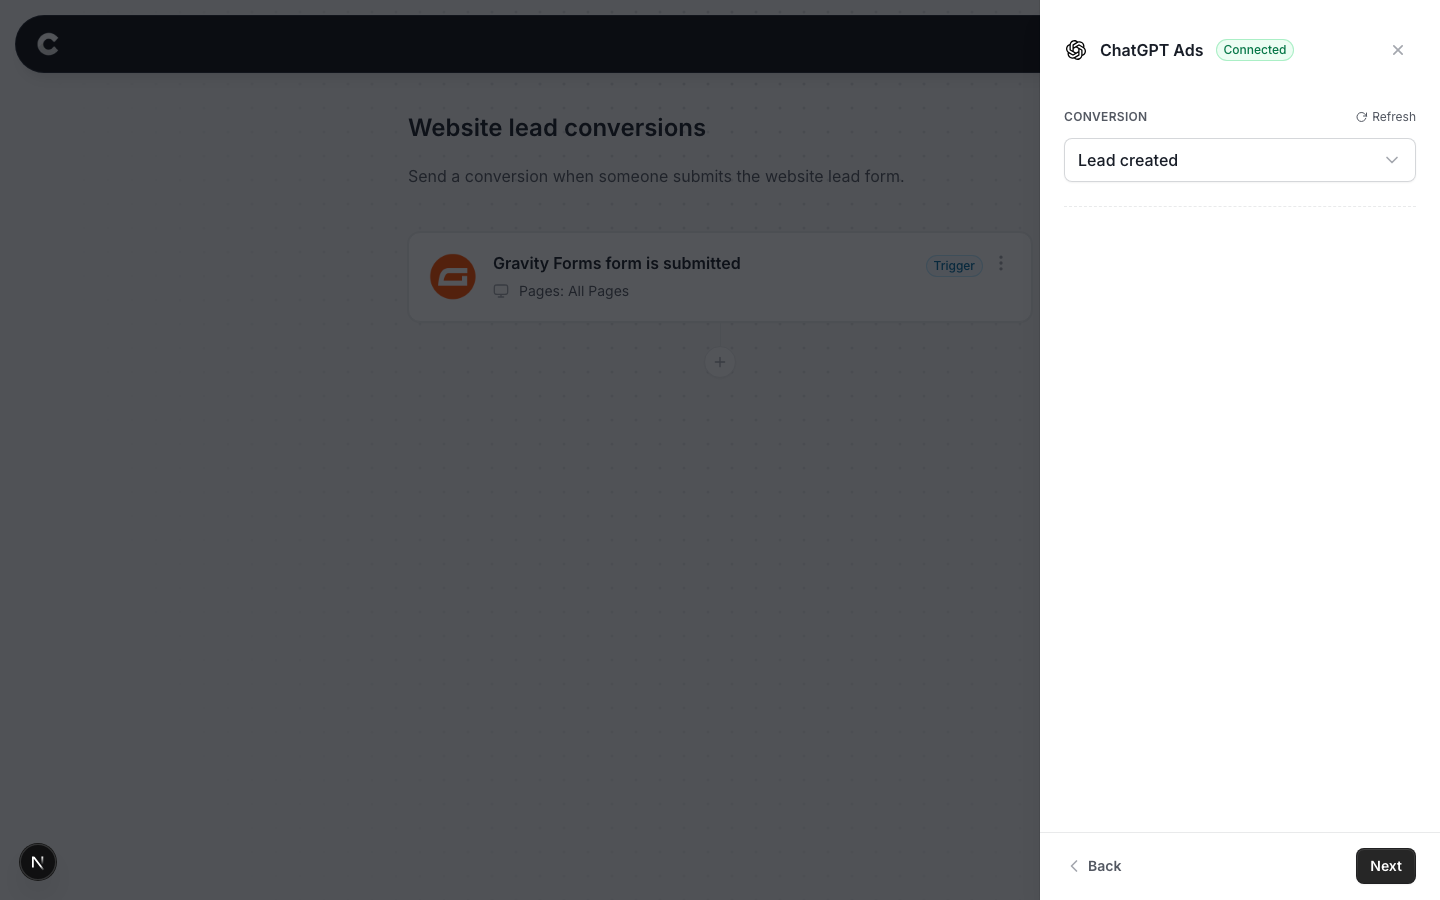
The next step is to pick which conversion event Converly should record. The dropdown lists the conversion events that exist on your data source.
If there isn't one yet, simply choose Create a new conversion from the bottom of the dropdown. You can create a Lead created, Registration completed, or Appointment scheduled event. Most people sending form conversions want Lead created.
Step 7: Send a test
ChatGPT Ads has a live event stream, so you can watch your test conversion arrive in real time.
- In ChatGPT Ads Manager, go to Tools, then Conversions, and open the Event Stream tab.
- Make sure your data source is selected, then click Start polling. Leave the page open.
- Back in Converly, click Send test event.
Watch the Event Stream page. The event usually appears within a minute, with your event type shown and the channel listed as server_to_server. Once you have seen it, click Add action and publish the flow.
If automatic setup isn't available
Some ChatGPT Ads accounts don't have API setup access yet. If yours is one of them, Converly tells you during Step 4 and offers a manual path instead.
For the manual path, you create the data source, the Conversions API key, and the conversion event yourself in Ads Manager (all under the Conversions section), then give Converly 3 things:
- Data source ID - shown next to your data source in the Conversions section.
- Conversions API key - OpenAI shows this key once, at the moment you create it. If you didn't save it, simply create a new one.
- Conversion event - pick the same event type you created in Ads Manager. This matters, because OpenAI quietly accepts events that don't match a conversion event and never reports them.
What happens next
Once the flow is published, real conversions flow to ChatGPT Ads automatically. You can also watch them arrive in Converly on the Activity page right away.
If conversions stop showing up in ChatGPT Ads later, check that the flow is Active rather than Draft in Converly, and that the connection still shows as connected under Settings. If the connection has broken (for example the API key was revoked in Ads Manager), simply reconnect and pick the same data source again. Nothing gets duplicated.