
A site is one website you track with Converly, usually one client's website. On a Multiple sites plan you can add a site for each client, up to the number your plan covers (5, 10 or 20).
Each new site starts fresh, with its own tracking code, flows and connections. Adding a site doesn't change your bill, as long as you have space on your plan.
Before you start
You need a Multiple sites plan (5 Sites, 10 Sites or 20 Sites) to add sites. If you're on Standard or Premium, change your plan first. Your current website becomes your first site, and you can then add the rest.
To add a site, follow the instructions below:
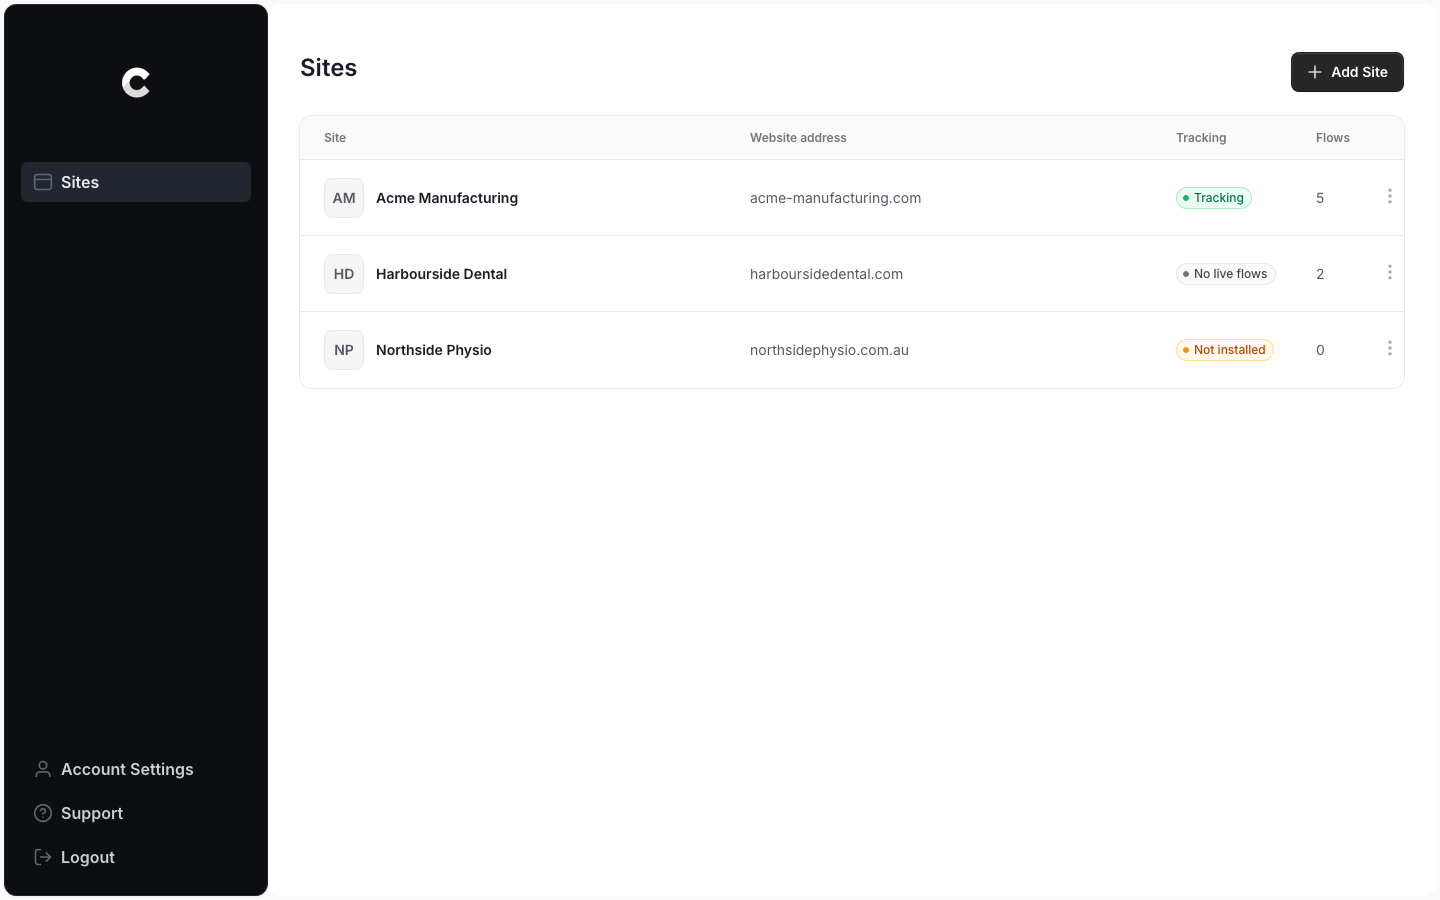
Step 1: Click Add Site
The first step is to open the Sites page and click Add Site at the top right.
If you see Upgrade to Add Sites there instead, you're already using every site on your plan. See At your plan's limit at the bottom of this article.
Step 2: Enter the site's details
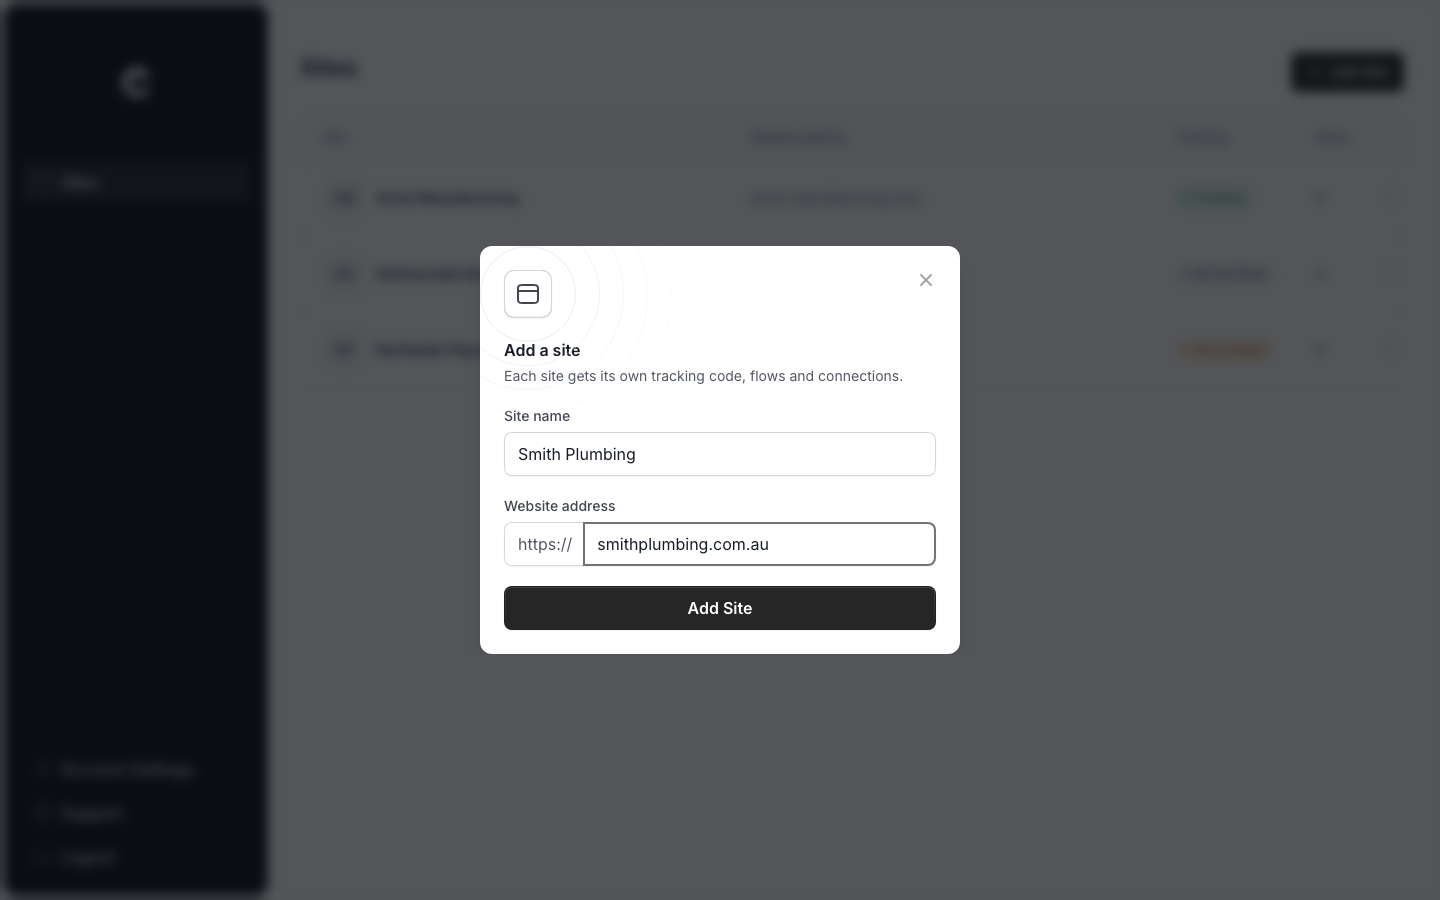
The next step is to tell Converly about the website. A window opens with 2 fields:
- Site name. What you call this site in Converly, usually the client's business name. Only you see it, and you can change it later.
- Website address. The client's website. The
https://is already filled in, so simply type the address, for examplesmithplumbing.com.au. If you paste a full link, Converly removes thewwwand any page path for you.
Make sure the address is the website where you'll install the code. Converly only accepts this site's conversions from that address.
Step 3: Click Add Site
Click Add Site. Converly creates the site and takes you straight inside it, to its empty Conversion Flows page, with a message confirming the site was added.
The new site shows as Not installed on the Sites page until its tracking code is on the client's website.
If Converly can't add the site, the window tells you why:
- Enter a site name. The site name is empty. Type a name and try again.
- Enter the website address. The website address is empty.
- That doesn't look like a website address. Check for typos. The address needs a full domain, like
smithplumbing.com.au. - Already in your account. The window says the address is already in your account and names the site it belongs to. Each website can only be in your account once, so click Go to That Site to open the one you already have.
Step 4: Install the tracking code on the client's website
The next step is to put the site's tracking code on the client's website. Each site has its own code, so make sure you copy it from the right site rather than reusing code from another one.
Inside the site, click Site Settings in the left sidebar, then open the Install tab. Click Copy Code and add the code to the head of every page of the client's website. If someone else looks after the website, simply send them the code.
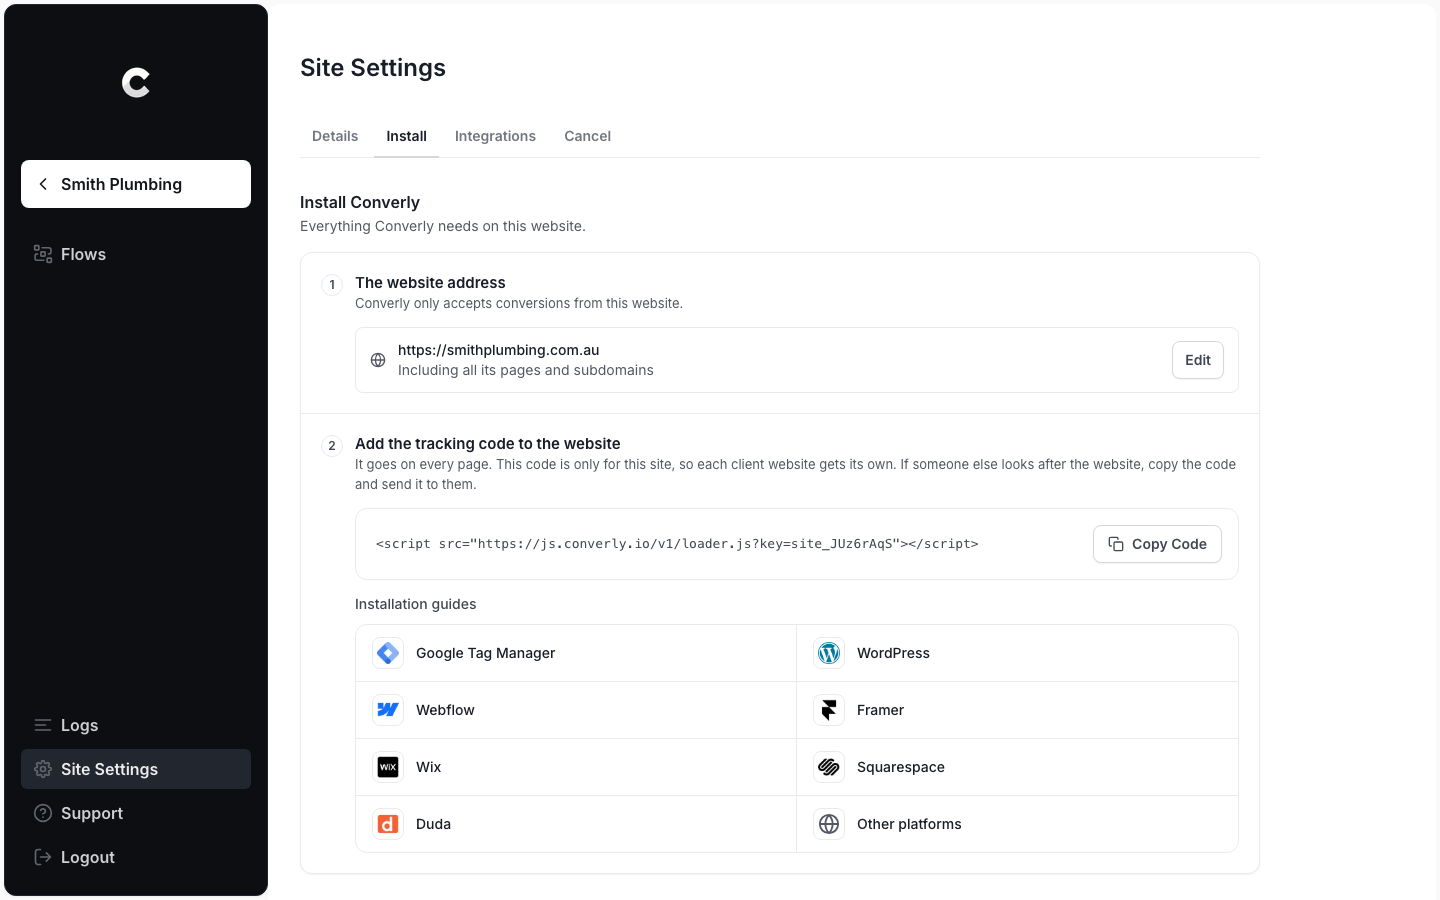
You'll find step-by-step instructions for each website builder in Install Converly. Those articles say to click Settings. On a Multiple sites plan, use Site Settings inside the site instead.
Converly's plugins and apps don't work on Multiple sites plans
The Converly plugins and apps for website builders (like WordPress, Webflow and Framer) only work with Standard and Premium accounts. If you try one with a Multiple sites account, it shows This account manages several websites. Add the tracking code to the website's head yourself, or through Google Tag Manager.
Step 5: Build the site's flows
Now build the flows for this site, the same way you would for any website. Click Flows in the left sidebar, then Create New Flow. You can read how to build a flow here.
Connections to ad platforms and lead tools belong to each site. So if 2 of your clients both advertise on Google Ads, you connect Google Ads inside each site and pick the right ad account for that client.
Test it works
The final step is to check everything works. Open a new incognito window, go to the client's website and submit one of the forms your flow tracks. Then check the conversion shows in the site's Logs in Converly, and in the ad platform. You can read more about how to test Converly properly here.
That's it! The site is set up and tracking.
At your plan's limit
When you're using every site on your plan, the Sites page shows a notice like You're using all 5 sites on your plan, and the Add Site button becomes Upgrade to Add Sites. You have 2 options:
- Move to a bigger plan. Click Change Plan in the notice, or Upgrade to Add Sites. The Change plan window opens with the next plan already picked. Unless you're on a free trial, you're charged the difference for the rest of your billing period straight away. See Change your plan.
- Remove a site you no longer need. That frees up its space straight away. See Remove a site.
If you're already on 20 Sites, click Change Plan, then Talk to us about Enterprise at the bottom of the window.
Not sure where a setting lives now that you have several sites? Account Settings and Site Settings shows you where everything is.