
The Customer Data Terms are Google's confirmation that you are allowed to share customer data with them. Google will not accept conversions from Converly until they have been agreed, so this is usually the last thing standing between your flow and live conversion data.
Your conversions are tracked by a manager account, so you accept them in the manager rather than in the advertiser account. Google deliberately keeps the setting there. If you go looking for it in the advertiser account you will not find it, because it is not there to find.
The upside is that you only do this once. Accepting in the manager covers every advertiser account whose conversions that manager tracks, so an agency with 5 clients does this a single time rather than 5 times.
Follow the instructions below:
Before you start
You need Admin access to the manager account, not to the advertiser account. Accepting terms on behalf of your company is an account level agreement, and people with Standard access often cannot see the option at all. If you are not an admin on the manager, simply send this article to whoever is.
You do not need to touch your website, install a tag, or change anything in Converly while you do this.
Step 1: Switch to the manager account
Sign in to Google Ads and switch to the manager account using the account switcher in the top right.
This is the step people get wrong, so it is worth a second look before you go on. You want the manager, not the client account you connected to Converly.
Step 2: Accept the Customer Data Terms
Inside the manager account, click the Goals icon in the left menu and choose Settings.
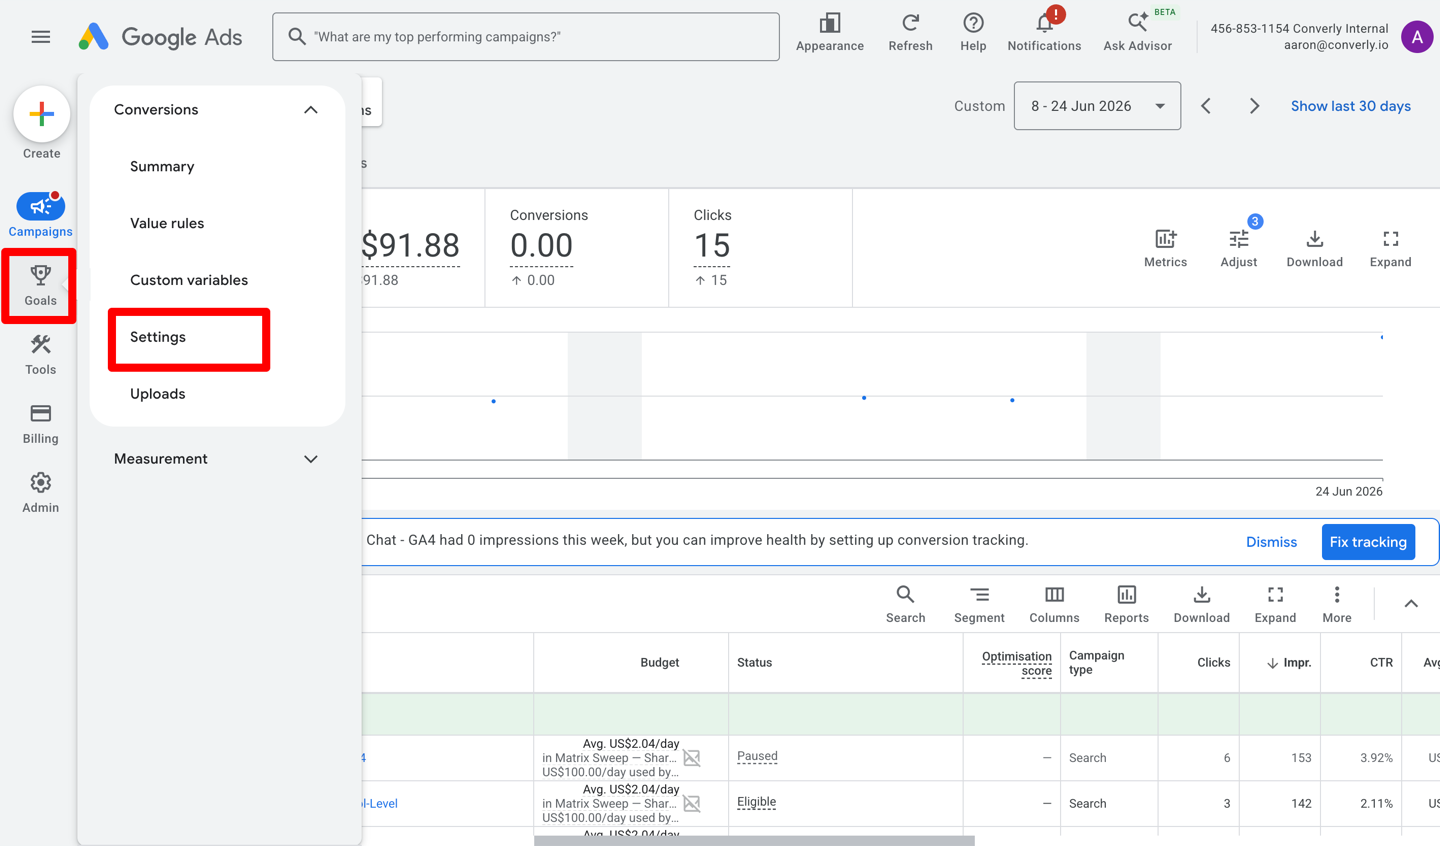
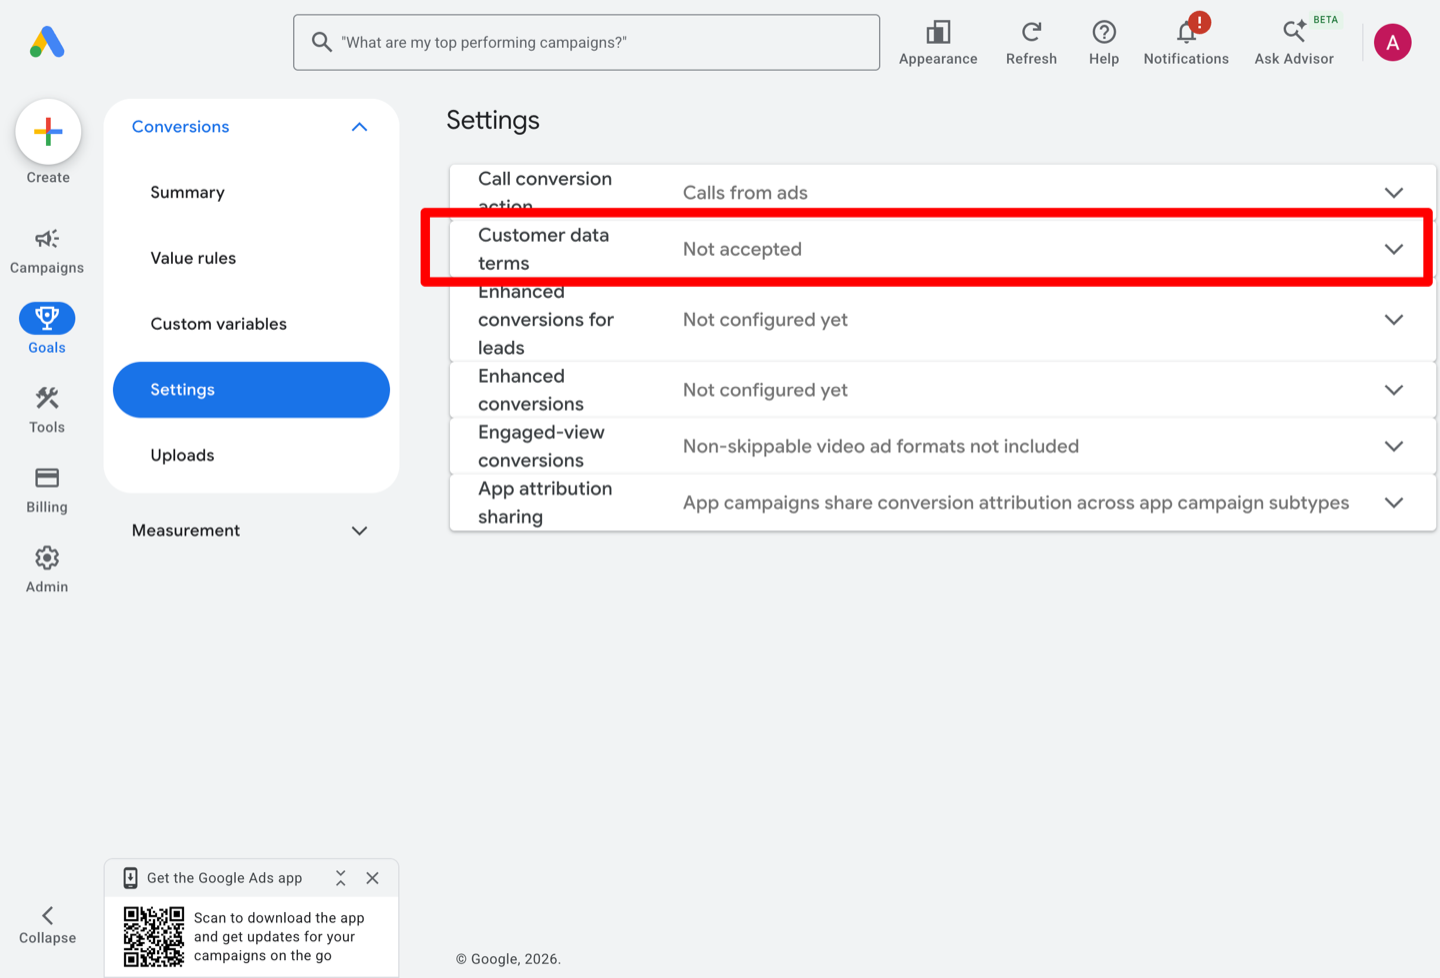
Find the Customer data terms row and click the arrow on the right to expand it. If the account has not accepted yet, this row reads Not accepted.
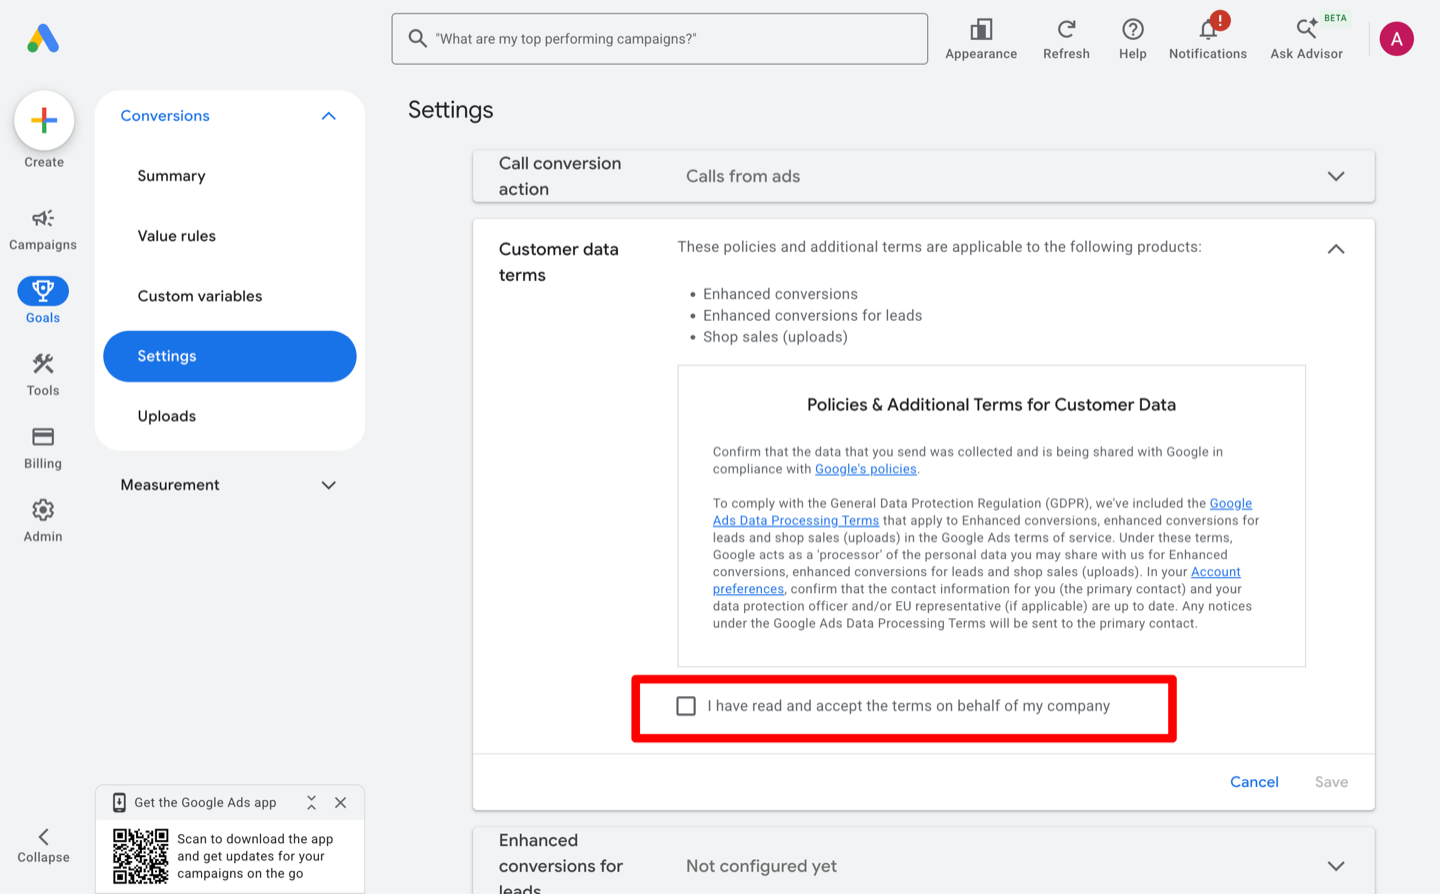
The terms open in the row itself. Read the Policies and Additional Terms for Customer Data, tick I have read and accept the terms on behalf of my company, then click Save.
Step 3: Turn on enhanced conversions for leads
Accepting the terms tells Google it is allowed to receive the data. Turning on enhanced conversions for leads is what actually lets Google use it. Converly needs both, and they are two separate rows on the same screen.
Still in the manager account, on Goals, then Settings, find the Enhanced conversions for leads row and expand it.
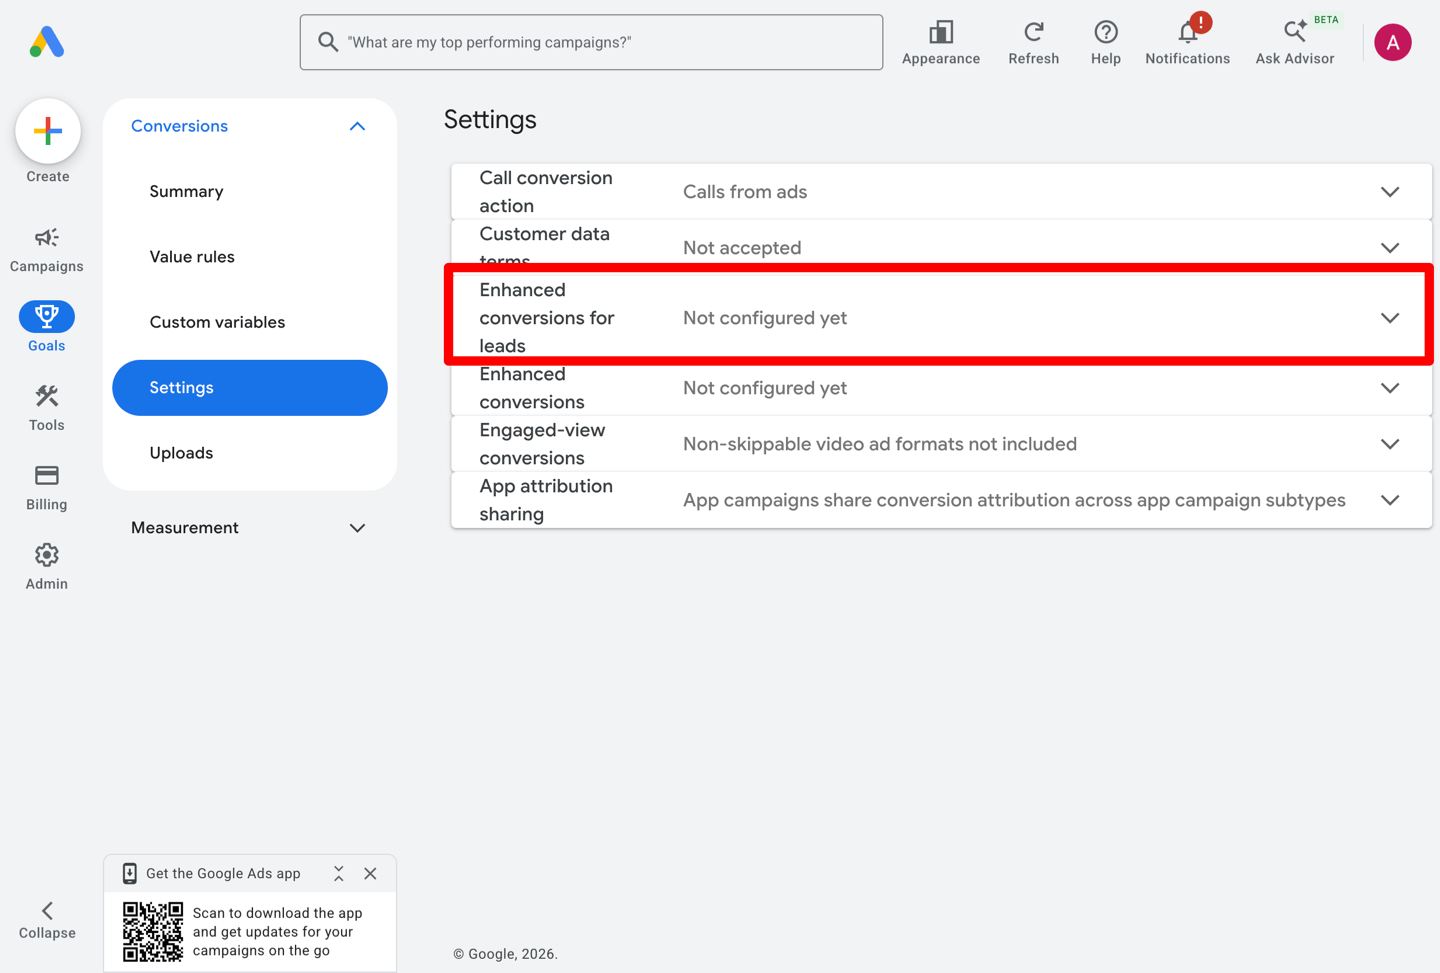
Tick Turn on enhanced conversions for leads, choose Google tag in the method dropdown, then click Save.
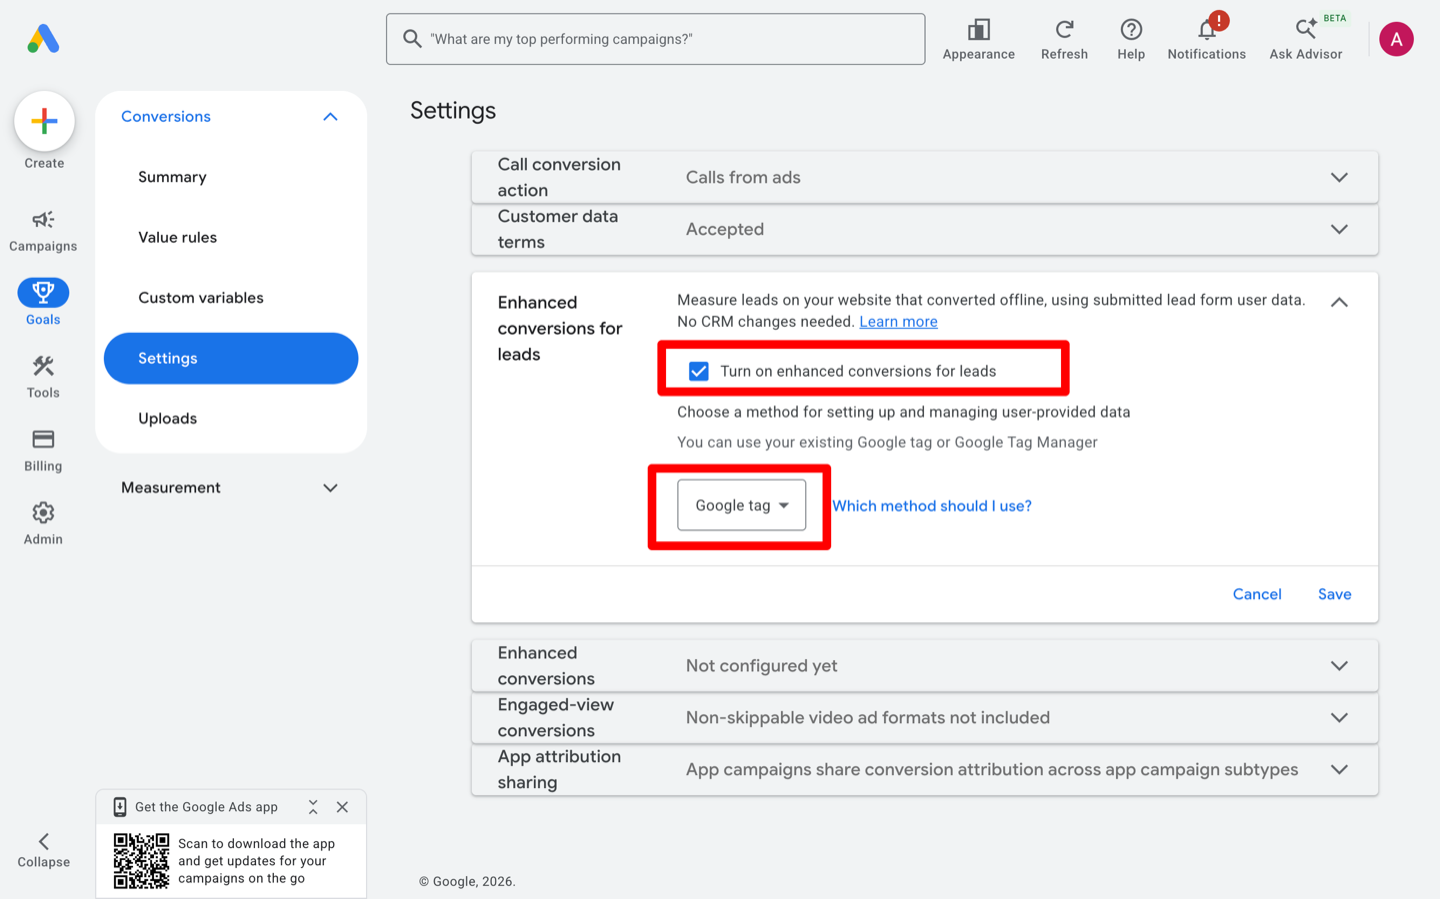
There is a separate Enhanced conversions row just below this one. That is for conversions measured by a tag on your website, rather than sent from a server the way Converly sends them. You do not need to change it.
Step 4: Go back to Converly and check again
Return to the Converly screen that sent you here and click Check again.
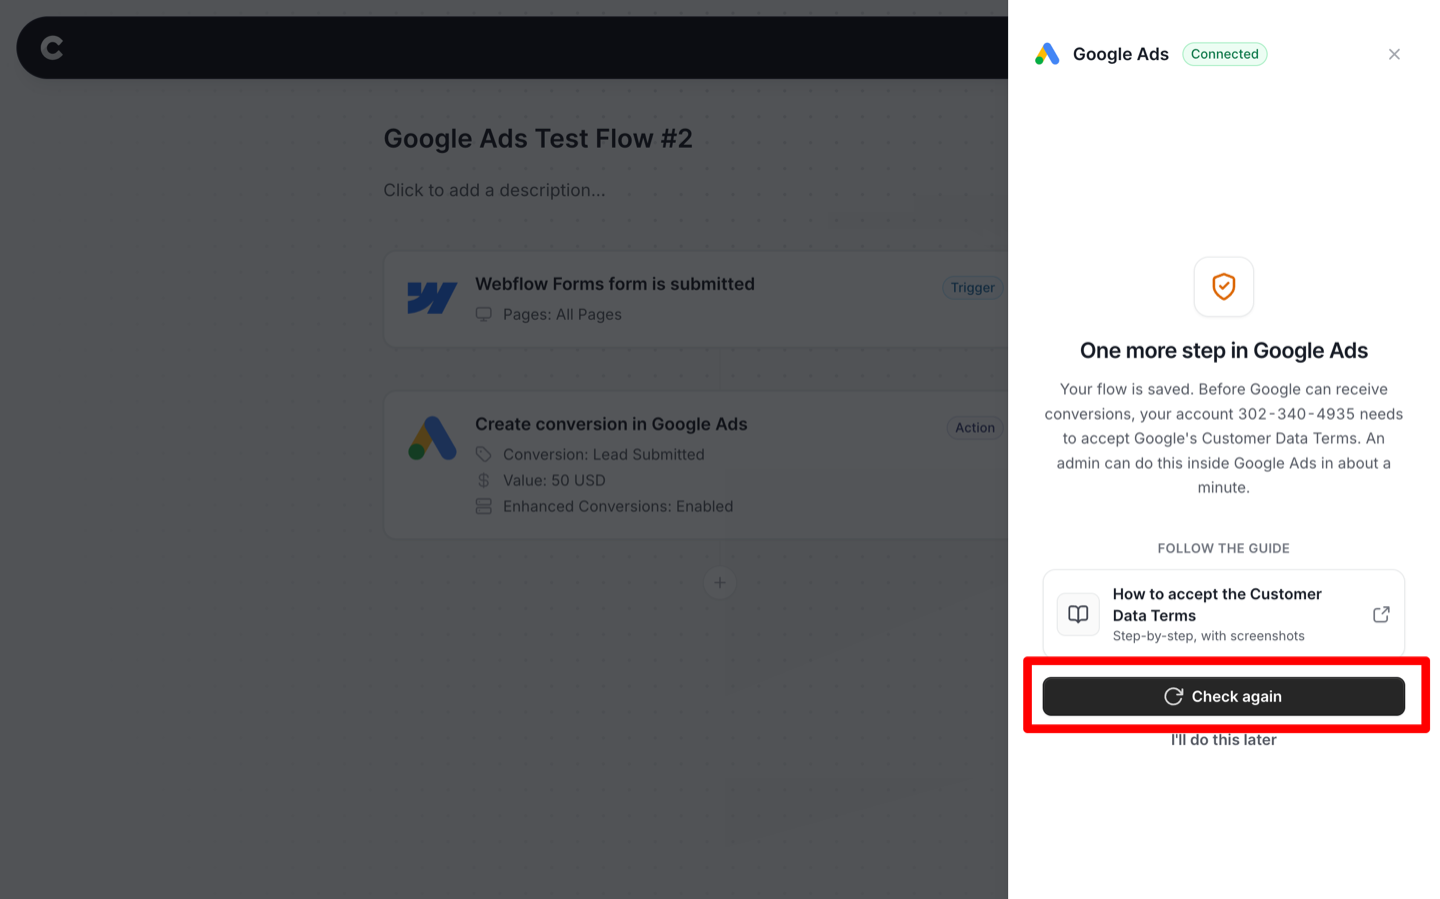
Acceptance can take up to a minute to reach Google, so if the screen says the same thing, simply wait a moment and click it once more.
You do not need to reconnect the account or rebuild your flow. Your flow was saved before this screen appeared, so I'll do this later is always safe to use, and picking this back up later costs you nothing.
That's it! Once Converly comes back ready it takes you straight on to testing your flow.
If it still says the terms are not accepted
Check you accepted in the manager, not the client account. This is the usual mix up. The setting has to be accepted in the manager account that tracks the conversions, so go back to Step 1 and switch accounts first.
Check that enhanced conversions for leads is actually turned on in the manager account. Accepting the terms on its own is not enough, and it is easy to finish Step 2 and stop there.
If there is more than one manager in the chain, and conversions are uploaded on behalf of a manager above this one, each manager in that chain needs to have accepted. Start with the account Converly named.
Check the access level of the Google account you connected. Converly reads the setting back through that account, so if it has less than Standard access on the manager account it cannot see that you accepted.